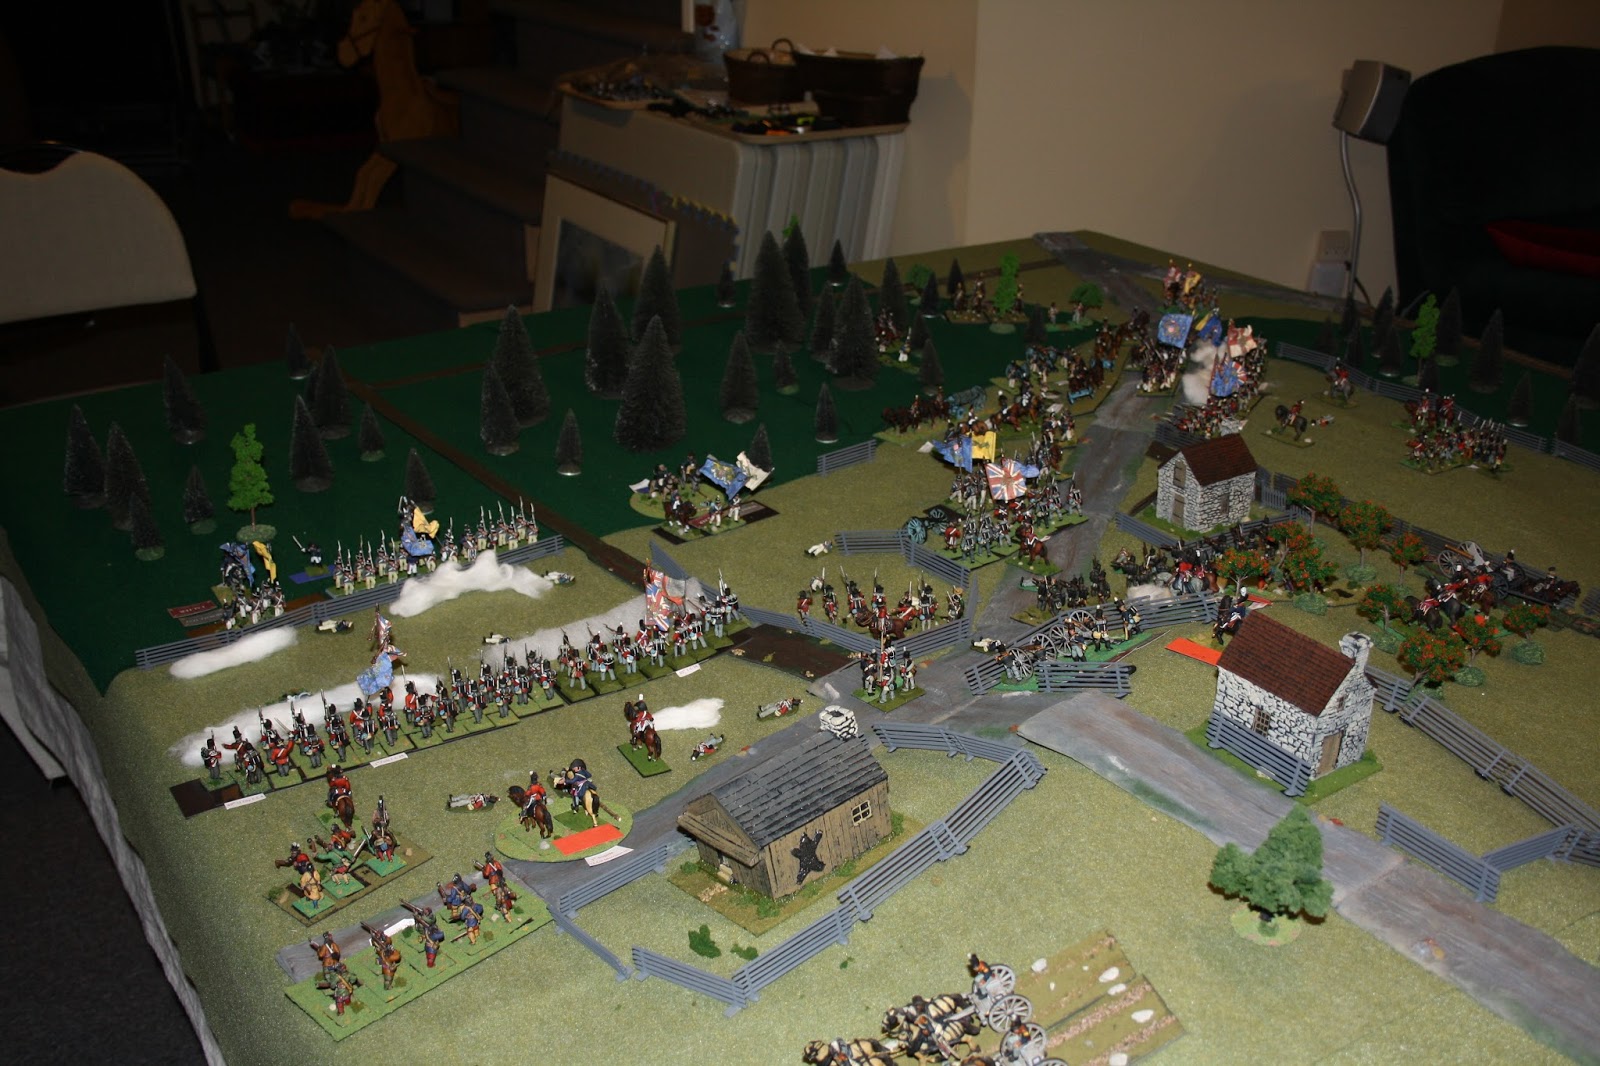
Those Are Regulars!

Those Are Regulars!
Scott Leading the First Brigade

Sunday, 16 August 2015

Lundy's Lane Redux - Session Three - Thursday 13 August, 2015

Even though we started a half hour late this evening we managed to complete five turns. The session covered the period 0550 to 0630, which included an increase of visibility from 24" to 36" at 0610.
The following photos represent the end state at 0630.

 A view of the left flank of Scott's First brigade,  The are holding their own, however, ominous clouds of dust are observed on the other side of the ridge ahead.

 Looking at the right flank of the First Brigade. An American skirmish line has held off the British skirmishers. However, the 25th US Inf  (left foreground--the remainder of First brigade is top left) ) has suffered a retreat but recovered to an unformed state.Will the 25th and its skirmish screen be able to hold off the 1st Royal Scots? Can the First brigade hold off an unseen enemy?

In the center a view of Ripley's Second Brigade and the divisional artillery. Finally, Norton's Mohawks have been wiped out by 12 pdr canister fire. They have managed to thwart Second Brigade's advance in concert with British artillery.
That infernal rocket unit has scored yet another double six, causing casualties and a forced rout hence dispersal of Capt Ritchie's battery. This is significant blow to Brown's  artillery capability to say nothing about Second Brigade's capability to advance.

Meanwhile on the American right flank Porter's brigade has steadily advanced against the Canadian militia. 

However, the Canadian militia skirmishers have a slight edge in the skirmish fire fight in the woods. 

 Although the IMUC has been driven back by Porter's brigade, specifically the 5th Pennsylvanians, it is now screened by a detachment of GLI in skirmish order. In reserve is the 1st Militia Bde Battalion.

 The British center with the 89th Foot, 5.5" howitzer, 24 pdr and that infernal rocket detachment dominating the the hill.

A close up of the 19th LDs protecting the British right flank (sorry, yet another photo of them but this my favorite unit). 

A view of the 1st Foot Royal Scots facing off Scott's First Brigade.

The American American has reached another significant battlefield milestone. Can it contunue the offensive? Or will it be forced into a defensive stance, particularly in view of its loss of artillery from First and Second brigades?
Find out in Session Four.

Saturday, 8 August 2015

Lundy's Lane Redux - Session Two - Tuesday 4th August 2015

Session Two consisted of the ten minute turns from 0520 to 0540. Unfortunately we did not start until about 1945 and finished at about 2145 hence only three turns. Nonetheless, they were momentous turns with significant impact on the American tactical plan.

Also, the 0530 turn D6 throw for the Grand River Indians resulted in a D1 = disperse., which gave the American forces some comfort. Note that the visibility increased to 24" at dawn 0530. This increase had a significant impact on the U.S. Second Brigade's advance in the face of British guns on LL hill top.

The following photos represent the situation at the end of 0540 turn:

 A view of the American left flank. Note the gap in the middle of Scott's brigade. That is where the U.S. 25th stood. It was routed and subsequently dispersed by the Provincial Light Dragoons supported the 19th LD. Previously, the 19th LDs charged the US LD and won the melee, which resulted in a PUSH BACK for the US LDs
On the right the US 22nd are engaged with the 1st Foot (Royal Scots). The 1st concentrated their fire on Towson's 6pdr (left of the 22nd), eventually wiping out the crew.

Another view of left portion of the First Brigade. Both sides cavalry have withdrawn to their respective lines. 

 Another view of the right flank of the First brigade. Note the remnants of Towson's 6 pdr.

NTF. some debate ensued re "opportunity fire" from American artillery versus pursuing British cavalry. GdeB only provides for "Support Fire" by artillery during the charge phase when the enemy cavalry is at the half-way point. Nonetheless, I have posed the issue to the GdeB forum in hope of receiving some clarification. The following is what I posted:

Greetings Gents,
In our last week’s session of the Battle of Lundy’s Lane we came across an unique situation regarding the possible use of “Opportunity Fire” from artillery.
The term “Opportunity Fire” comes from a derivative of “Battles for Empire “that we use for very large battles. Basically, it is meant to cover situations where an enemy unit (usually cavalry) wonders across the frontage/arc of a friendly artillery battery or an infantry battalion, in a movement or charge turn (sometimes in pursuit of a friendly unit). So, while not in the firing phase the friendly artillery unit could declare “opportunity fire” within certain distance parameters.
The closest GdeB rule that I have read that might address this situation, somewhat is 7.8 (3) SUPPORT FIRE. At the half way point artillery could fire on the enemy charger but not from long range.
However, in our Lundy’s Lane situation the enemy cavalry was pursuing friendly cavalry (subsequent to a charge—ie pursuit) and at one point came within the firing arc of a friendly artillery unit. The artillery player declared opportunity fire and I reluctantly ruled no as there did not seem to a GdeB rule to cover this type of situation.
Also, I was aware of 10.29B - FRIENDLY UNITS ARE TOO CLOSE TO THE ENEMY RULE, which states that friendly artillery can’t fire on enemy units that are within 6” of a friendly unit.
Did I make the right ruling?
Should there be an “Opportunity Fire” rule option as part of GdeB rules.
Your comments are gratefully appreciated.

 A view of Ripley's Second Brigade facing off against the British artillery with the 89th Foot in support. The American plan to close with British guns in darkness has failed and with the increased visibility the American infantry is taking heavy casualties from canister fire. Ritchie's battery has taken some casualties from the behemoth 24 pdr and those infernal rockets! 
Ripley has recovered from his light wound and has returned to the Second brigade to re-evaluate his tactical plan.

A view of the right flank of Second Brigade with Porter's 5th Pennsylvania bottom center. Incredibly, Norton's Mohawks are still in the building despite being at 50% manning (morale checks every turn) and being fired upon by engineers. Bottom right; the Canadian militia are engaged skirmish style with the Canadian (American) Volunteers  in the woods.

A view from the British/Canadian left flank looking north up LL road. Center foreground left are the IMUC and beyond up the slope are the GLI. To the right is the 1st Canadian Militia Brigade (actually a battalion).

 Another view of the British right flank looking south up LL. Mid left top--top to bottom....an unknown British unit, the remnant of the PLDs and the 19th LDs to the left and US LDs, Towson's howitzer and the 9th Infantry.

 A close up of the command troop of the 19th Light Dragoons.

 A close up of those infernal rockets.

A close up of the behemoth 24 pdr firing canister at the American Second brigade.

As stated despite a mere five turns, significant and possibly game changing events have occurred. Will Scott's brigade now have withdraw in the face of significant losses. What will Ripley's brigade now do in the face of withering fire from the hill top British guns?

Stay tuned for Session Three.

Saturday, 1 August 2015

Battle of Lundy's Lane (redux) 26 July, 1814

There was a consensus that we should reply Lundy's Lane with the participants exchanging armies.

The Scenario

In this redux scenario, Scott wisely chooses not to immediately engage (blunder in-to a firefight as in the actual battle) the British on Lundy's Lane hill top, particularly as he is outnumbered. He waits outside of British cannon range and is soon is conversing with Major General Brown. Brown wisely orders Scott to maintain his position and orders up the other two brigades and additional artillery. During the night all three brigades will advance as close as possible to the British lines while avoiding a skirmish between pickets. The U.S. left Division will attack in the darkness just prior to dawn of an early morning...26 July, 1814.

The Game Mechanics

At first, I considered using a curtain across the middle of the table so that each side could place their units in secret. However, the logistics of a dividing curtain was going to be problematic. Instead the following  method using battle table maps for the American players was utilized. players 

The British players, Paul G. and Steve, set up their defensive positions of their brigade units by using red colored unit markers of various sizes not necessarily representative of the size of the unit depicted...fog of war. The markers were showed blank side up with the unit designation on the obverse -hidden. The unit figures were placed on the battlefield when it was been spotted by an enemy unit. 

In the mean time Paul M and Rod go upstairs to plan their attack (Rod has a cunning plan). They mutually agree that Rod will command (Brown) and Paul M. will control Scott's First Brigade along with all of the meager American cavalry. After agreeing on a plan of attack both players mark the positions of all of their units on two prepared maps. Coincidentally, the British players state their readiness to start just as Rod and Paul M. finish plotting all of the American units onto the maps...good timing. The American players head down to the war room and plot their blue unit marker sheets onto the battlefield table. The system worked well as it led to a few surprises and certainly added an air of unpredictability to the respective offensive and defensive positions.

The Time Line -Victory Conditions - Orders of Battle

The following tables show the time line of ten minute turns using General de Brigade rules with its growing addendum of War of 1812 specific subsets, the victory conditions and special rules regarding night movement and use/or non use of the Grand River Indians; the American OOB and lastly the British/Canadian OOB.


The first three turns take place in darkness, so visibility is only 12".

 This is a view looking down Lundy's Lane from west to east. Most  of the following shots were taken at the end of turn two. Scott's First Brigade is on the right moving up the slope to attack the 1st Foot on Lundy's lane.center left.
On the bottom of this photo the PLD and 19th LD.

 On the American right flank in the woods, the Canadian Volunteers are skirmishing with the Grand River Indians. The GR Indians have inflicted a casualty. Hmm re the dice roll rules the GRN are not supposed to be engaged. I must correct this on our next evening.

 Again on the right flank the Fifth Pennsylvania Volunteers center have been in a fire fight with the IMUC - center top. The 5th together with Capt Biddles's 12 pdr (left of 5th) have inflicted heavy casualties on the IMUC forcing them to withdraw.


 To the left of the 5th Penn, Biddles 12 pdr and the Sappers are engaged with Norton's Mohawks in the building. The Mohawks put a good fight but are down to 50% (2 figures) --still they pass their morale test and hold onto the building.
Capt Douglas and his 18 pdr (bottom left) has caused casualties to the GLI (top center) forcing it to skillfully withdraw to avoid possible annihilation.

 To add insult to injury Norton's Mohawks roll Double D6 when firing into the flank of the U.S.21st. forcing it to FALTER. Also, BGen Ripley (bottom right) is lightly wounded goes to rear to get medical attention.
To the left of the 21st, the 23rd is marching up the hill when out of the darkness the flash of a 24 pdr canister salvo rips into it, causing four casualties. Nonetheless, the 23rd passes its morale test.
The advance of the American Second brigade is blunted.

 A view from the British left flank. A decimated IMUC has wisely withdrawn in the face of the 5th Penn and Capt Biddle's 12 pdr fire.

 To the right of the IMUC Capt Machlachlane's 6 pdr supports the right flank of the IMUC while to its right the GLI are withdrawing.

 At the west end of the battlefield on LL, the 19th LD square of with the amalgamated American LDs while Scott's Brigade (right) looks on.


On the American left flank, Scott's Brigade advances up the hill. The 1st Royal Scots fore at the American 22nd.

For the next session there will be one more turn of darkness then the dawn will increase the visibility to 24 inches. The guns will become deadly.

Thursday, 18 June 2015

Lundy's Lane - Sixth/Final Session - Tuesday 16 June, 2015

The Sixth and Final Session
The following photos represents the end state at 0050 hrs. The visibility is still dark at 12 inches.
 I anticipated that the fragile American First Brigade would break and run, particularly as the it was still smarting from Brigadier General Scott ignominious departure during the last session. In fact all of the brigades managed to hold their ground to a greater or lessor extent.

A reminder of the Victory Conditions:

1 point - for sustaining 10% fewer casualties than the opponen
3 points – Possession Of Lundy's Lane Heights
3 points – Possession of Line of Logistics (note Br have two)


 A close up of the 1st Foot who along with the 89th moved forward to keep engaged with the remnants of the American First Brigade.

 Except for Norton's Mohawks during the early part of the battle, that Grand River Indians continue wait....to see who will prevail. 

 The Eleventh Infantry (left)  is down to five while the 25th remains strong. Both continue the musketry duel withe thin red line.

A view of the American right flank with the remnant of First brigade on the right and what is left of Ripley's Second Brigade to the left. Note First Regiment bottom left with Ripley behind them. They are down to two flag bearers but have managed to pass successive morale checks and so avoid dispersal.

 In the center; the IMUC successfully charged Biddle's 12pdr, which dispered in the melee. The Twenty-Third has moved forward to stop any further advance of the IMUC. Note that the GLI have recovered and moved forward to support the IMUC.
Bottom left, Richie's gun battery has recovered from its retreat (gun duel with Mackonochie's 6pdr) and has unlimbered to face a cavalry threat in the woods.

Bottom right the Canadian Volunteers (traitors) have driven back by the 104th Light Company supported by the 19th Light Dragoons (center bottom) and Provincial Dragoons (bottom right). 
The NY and PA volunteers have moved back to take cover behind rail fence while causing many casualties to the 103rd and 8th. However, the British are now starting to give as much they receive as they closed to effective musket range with Porter's brigade.  Again, Ritchie's guns are protecting the rear of Porter's Brigade from a possible cavalry attack.


 On the bottom center; the 104th are poised for a flank attack on the Pennsylvanians.

 left, the 2nd Militia brigade is supporting the 8th (left and the 103rd (right).

 A view northward along the Portage Road with IMUC battling the 23rd and the GLI in the orchard supporting the IMUC. To the extreme left Mackonochie's 6pdr has suffered successive falters as result of the engagement with the  American guns (Richie's Battery).

 A view of the British left flank with the thin red line on the left.


 Another view of the IMUC's charge on the American 12pdr.

A view east to west that captures nearly all of the engagement area. The American right flank to the right. Note; the left flank of the American line; the American line of logistics back to  their base at Chippewa has been cut by the 104th, the Provincial Dragoons and the 19th Light Dragoons. This is a key operational development that will affect the victory points. Also note that the British and Canadians still hold the Lundy's Lane heights as well as both of their logistic lines.

Despite a valiant American effort to hold their lines, they were unable to resume the offensive. Major-General Drummond's British and Canadian Force was able to capitalize on the fragile American Army and move foreword. In particular, the British 3rd Brigade in concert with cavalry support turned the American left flank and cut of their line of logistics.

The result was an overwhelming British/Canadian Victory of  seven points.

By popular request, the Lundy's Lane battle will be repeated. However, the next time Brown will wait until dawn the next day when all of his troops will be in position to engage British/Canadian Army, rather than the historical piece meal advance on LL.


Sunday, 14 June 2015

Lundy's Lane - Session Five - Tuesday 9 June, 2015

The following photos represent the situation at midnight.


 Looking at the American left flank with Porter's  Brigade to the right and the British 1st Brigade to the left. While the 103rd advances stoically, the N.Y. and PA volunteers fire and cause casualties. However, undaunted the 103rd continues to advance. 
Below center, the Canadian Traitors/American Volunteers have inflicted 50% casualties on the 104th's light company.


 Another view of the British 1st Brigade with the 103rd on the right in the middle the 8th, which is under fire from American guns and the composite Militia Brigade as a reserve located behind the 8th.


 Looking south to north across the center/main area of battle. Porter's Brigade has retreated to take advantage of the fence protection and is supported but two guns on its right flank. Porter's brigade is holding its position well. In the distance right are Ripley's Brigade and further top right what is left of Scott's Brigade. Left center is the solid British position commanding LL heights.


 The remaining two battalions of Ripley's Brigade (23rd left and 1st right) supported by Biddle's 12pdr. The 21st after having made a valiant advance to the British guns was repulsed with heavy casualties and subsequently dispersed. A company of American pioneers anchors Ripley's left flank. Below center right, MGen Brown contemplates the tenuous hold of the First and Second Brigades.


  Even though the First brigade has been decimated, it has been galvanized by Scott's leadership/tenacity. Then the  unthinkable has happened (the dreaded double six) Scott receives a volley from the 1st Foot and "Panics at the sound of gunfire and flees the field...." Oh the horror! The remaining remnants of the First Brigade, the 25th (left) and the 11th (right), which has faltered, struggle to hold their position under a poor rated colonel . Nonetheless, the 25th is at full strength, so will the First Brigade continue the firefight?


 A close up of the 11th (left) and the 25th (right).


 The thin red line (1st and 89th) holds the Portage road and so protects its vital logistic line to Fort George.


 Drummond confers with Riall near the LL meeting house.


 The LL heights/British center position. The allied Indians are gathered around the meeting house. So far they have played little action in the battle. No doubt are dumbfounded as to how their white brethren are willing to stand exposed in open field and blast away at each other until one side gives up. They are content to wait and see which side is the last standing.


 The IMUC (upper left center) has moved forward to engage Ripley's Brigade while the GLI move forwar to support them. In the center, Capt Mackonochie's 6pdr  has unlimbered and is ready to support the 8th to its right. The 2nd Canadian Militia Brigade (Battalion) (center) is held in reserve  to the rear of the 8th Foot.


An overall view of the British right flank and Ist brigade's advance against Porter's Brigade in the distance right. Bottom right the remaining two companies of the 104th advance to support their beleaguered light company.

The sixth session will start at 0010 hours. With a mere five ten minute turns left, will the brittle First and Second American Brigades hold the line or will they break under the relentless fire of the British not so thin red line. Will Porter's Militia Volunteers turn out to be the heroes of Brown's army. Only time and the next session will tell.