Those Are Regulars!

Those Are Regulars!
Scott Leading the First Brigade

Sunday 31 May 2015

Lundy's Lane - Fourth Session - Thursday 28th may, 2015

The Battle of Lundy's Lane
Fourth Session
2230 - 2310
A lot of maneuvering in race for an advantageous position before darkness at 2250. As a result an increase in combat and resulting casualties, which forced several morale checks and resulting retreats and routs.

 On the American right flank the 11th and 22nd regiments of Scott's Brigade battle it out with 1st Foot and the 89th Foot. Both sided suffer significant casualties. The 25th regiment is in reserve behind the Ritchie's guns, while the remnants 9th hold in the rear. One of Ritchie's guns has suffered 75% casualties so is not likely to remain on the battlefield much longer.

 Ripley;s brigade has steadily adcanced uphill but a suffered many casualties. The 21st has suffered a retreat that forced it to interpenetrate the lines of the 1st regiment disordering it. On the left of the aforementioned regiments , the 23rd Regiment appears ready to advance have forced (with help of Towson's guns on their left flank) the GLI to retreat.


A view looking north. The 8th Foot (left foreground) snaking its way down towards Porter's Brigade. Just north of the 8th is GLI in its retreat position just ahead of the IMUC. Center top the British guns have manged to hold off the Ripley's advancing brigade with the help of part of the 89th Foot and Lincoln militia.

 Porter's Brigade tries to advance in the dark (dark reduces visibility to 12" inducing a 1D6 roll to determine a random direction). Hence the odd direction of the N.Y. Volunteer regiment on the right. In the mid distance right is the 104th Foot and the 8th Foot snaking their way down the field. To left in the distance is the 103rd Foot hugging the fence line. Further left in the light woods is the Light Company of the 104th. Further left on the road (avoiding the random D6 roll) is the 19th Light Dragoons.


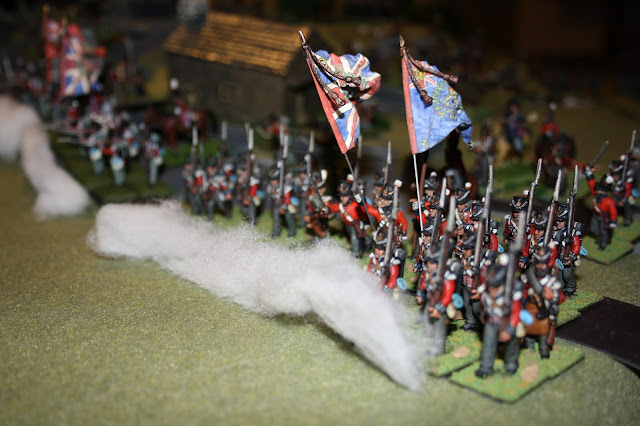
 A close up of the 1st Royal Scots volley against the American First Brigade. The 89th Foot are to the right of the 1st in left distance.

 A close up of the 22nd and 11th regiments about to give  a volley in return.

The 89th divide their fire between the American 1st and 2nd Brigades while the Lincoln militia support the British guns. Ripley's Second Brigade is in the distance on the upper left.


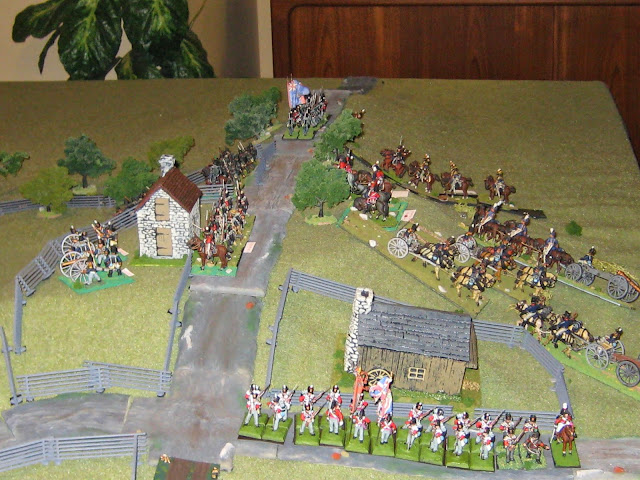
 An overall look at the battlefield with view SSE from the British perspective. Will the guns be effective with the reduced visibility? Porter's Brigade has yet to engage in combat with the steadily advancing but snaking way of Scott's British Brigade. On LL hill, the British and Canadians are managing to hold off the American advance but with considerable casualties. The Americans are making advances but are also suffering heavy casualties. Can they maintain the momentum in the face of two unit retreats or will they have to re-group before another assault?
The Fifth Session will begin at 2320 in the dark.

Sunday 24 May 2015

Lundy's Lane - Third Session - Thursday 21st May, 2015

A lot of combat took place in this session, which took place from 2200 to 2220. This partly explains why we only completed three turns. This session was also marked by our first cavalry versus infantry action. I am experimenting with a newer/better camera so bear with me regarding the photos.

 The American view looking NNW with the most of the Yankee guns placed on the Queenston  Road. Porters' Brigade is deploying west of the road to face the British 1st Brigade coming in from the Burlington Road area.
 On the American right flank. What is left of Scott's First Brigade is still engaged with the 1st Royal Scots and the 89th regiments. The doodles are still taking casualties but are no inflicting significant casualties on the British. Ripley's Second Brigade to left of Scott's is inflicting heavy damage on the British by neutralizing both the rocket battery and the big 24pdr. Most of the British casualties were caused by the supporting fire of the aforementioned U.S. guns.
 An overall view looking west over the woods with American guns on the left, next right Ripley's Brigade and then Scott's.

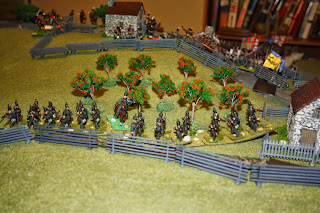
 A view looking NNE with Porters' Third Brigade on the right deploying onto to open field. In center middle is Glengarry Light Infantry at the ready in the orchard against the rail fence. To the right of the GLI is the Incorporated Militia of Upper Canada. In the left foreground, LCol Scott is scouting ahead of the 1st Brigade. It seems likely that an engagement will soon take place on this field.
 Scott's 1st Brigade getting underway after a major cavalry engagement manged slowed its movement eastbound. Yours truly was remiss by not getting some photos of the cavalry engagements, particularly as it was the first one in  our War of 1812 games series. Nevertheless, a statement will have to make do. 
The New York Volunteer Dragoons managed to occupy the attention of the 19th L.D.s while the regular L.D.s unexpectedly charged the 103rd Foot, which was in column. The U.S. L.D.s passed their charge home test and the 103rd passed its formation change test ( to square). Fortunately for the 103rd, the L.D.s were at near max charge distance, which meant that it when it was moved to the charge half way point it was slightly over half its charge distance. This meant that the 103rd had time to form square. It was a matter of an inch or so. This meant that the instead of the L/D.s attacking a vulnerable 103rd in column it had to attack a formed square. The results were devastating; the L.D.s were destroyed in a combination of defensive fire and ensuing melee.
In the other cavalry engagement; the NYVDs retired having successfully diverted the 19th LDs attention away from the regulars. However, in the next turn the 19th caught up with them and inflicted a casualty...they got off lightly. However, the NYLDs were routed and in the subsequent turn dispersed.
All in all it was a brilliant tactical move by the American cavalry that was robbed of a qualified success by a matter of an inch. However, the American attack slowed down the British advance by at least three turns, which could proved significant.
 The congestion in the center of British lines on the LL summit is somewhat relieved after the routing of the rocket battery and the 24pdr crews plus the movement forward of the GLI and militia.
 A close up of the 1st Royal Scots in action.
 A close up opposite the 1st Foot is the Twenty-Second Infantry of Scott's Brigade.
 A close up of the GLI in the orchard, with a mounted LCol Battersby giving encouragement.
A scene of heavy fighting in front of the British guns. The rocket battery and 24pdr are abandoned in the face of American artillery fire combined with Ripley's attack led by the Twenty-third Infantry. To the left of the British guns the composite 1st Militia unit (Bde), which has recently moved into position. To the left are the remaining British guns a howitzer and a 6pdr.

It seems the battle of Lundy's Lane is reaching a culminating point. When the fourth session commences the time will be 2230 with darkness at 2250. Darkness will reduce the visibility to 12 inches coupled with the possibility of friendly fire and getting lost.

Monday 18 May 2015

Lundy's Lane Session Two - Tuesday 12 May, 2015


Lundy's lane Session Two - 2010 to 2150
During this session at 2140 the evening twilight reduced the visibility to 24".
The Americans have two lucky die rolls that give them Ripley's Second Brigade at 2030 and Porter's Third Brigade 2120. After three failed die rolls, the British Third Brigade arrived on the Burlington Road at 2130. So the Americans enjoyed a three turn advantage of having the most troops on the battlefield.

 Scott's Brigade has steadily advanced and pushed back Morrison's brigade but with heavy casualties.
Scott's 9th and 22nd regiments have lost their light coys and more to initial British skirmish action and then a devastating volley from the from the 1st Royal Scots (a double six roll by the British did not help the Americans either).
 Ripley's Second Brigade has come out of the woods to support the First brigade's left flank. The 21st regiment has been slightly unnerved by rockets flying over their heads. However the last volley crashed into the light coy and caused casualties and forced the battalion to Falter.
 All of the American artillery is steadily climbing the gentle slopes of LL hill on the Queenston Road to support Ripley's Brigade.
 Porter's brigade arrivves at 2120.
 Threatened by a charge form the 19th LDs the American cavalry retreat back into the woods. They are apparently supported by some unknown U.S. units.
 At long last, the British 1st Brigade arrived on the Burlington road and has received orders from LGen Drummond. They are appearing to deploy so as to protect the British/Canadian right flank
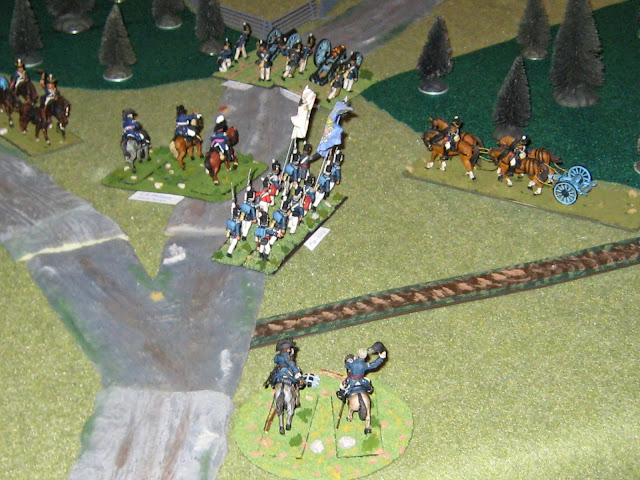
 LCol Scott and his aide survey the battlefield as his First brigade deploys. of LL Road.
 LGen Drummond tries to manage the congestion at the center of the battlefield on top of LL hill.
A look at the U.S. right flank from the British perspective. The 1st Foot in the center with the 89th on its right. They have their light coys deployed. Scott's First Brigade is top left and center while Ripley;s Second Brigade is off to the right.
The Third Session will commence at 2200. This means that there is only five turns of twilight left. At 2250 it is dark and the visibility is reduced to 12 inches. Like the real battle this engagement is likely to be bloody and costly.

Lundy's Lane Session One

Lundy's Lane Session One -Tuesday 5th May 2015
The battle opens at 1900 and continues in ten minute turns until 0050.
At various historical arrival times, both players will roll a 6D to determine a possible earlier arrival of reinforcements with a guaranteed arrival after three turns.

 These are the start positions of elements of LCol Pearson's Light Brigade. In the mid right on the Chippewa/Queenston road, the 19th LDs await further orders while guarding the the left flank. To the west on Lundy's lane are the IMUC, GLI and Lincoln militia with a 6pdr and howitzer on the left and just forward of the meeting house.

 American LDs with N.Y.Volunteer LDs plus a detached light company of BGen Scott's First Brigade recce in advance of the brigade.
 A view to the north and the Light Brigade on top of the Lundy's lane ridge.

 The following photos indicate the positions of troops at the end of session one.
MGen Brown has arrived on the field while the guns of Scott's brigade guard the entrance to the killing zone in front of Lundy's Lane.

 Towson's gun crews look up the Queenston road at Pearson's brigade.

 Surprise! Not adheering to historical convention, Scott's brigade has secretly made its way throgh the the light woods at the eastern end of the battlefield. American skirmishers have driven back Norton's Mohawks to the fence line.

 Drummond's cavalry has moved over to the LL hill top while in the foreground, the 1st Foot supports the 89th just off the photo below. These units of Morrison s Third brigade are securing the British/Canadian left flank from an apparent flanking attack by Scott's brigade.

 British Divisional artillery arrives in the form of a 24pdr gun and the Royal Marine rocket battery. Off to the left Morrison's Third brigade is holding the left flank.

 The 19th LDs struggle up the steep slop of LL hill to address an unexpected American cavalry threat to the British right flank.

Where did they come from!? American dragoons have secretly traversed the dirt farm road through the woods undetected and now threaten the British right flank. Will this daring thrust force the GLI and Lincoln militia into squares, or will the 19th LDs arrive in time to save the right flank. Further, are these American dragoons an advance element of an undetected American brigade sneaking though the woods? All will likely be revealed in next weeks session two.

Sunday 17 May 2015

The Battle of Lundy's Lane - Building the Topograhy

Building the Battlefield for Lundy's Lane
After the time consuming construction of the Queenston Heights battlefield, I vowed not to devote so much time to the next War of 1812 game. I adhered to my vow to a limited extent. The next game that we gamed was Chippewa, which took place on a flat terrain. So, it was quite a straightforward and fast set up.
However, I broke my vow for Lundy's lane. I think I was swept up with the historical value of the hill as a significant defensive position. General Drummond quickly recognized the defensive value of Lundy's Lane heights. Like Wellington he could quickly assess the tactical value of terrain.
The main sources for the topography were Donald Graves, "Where Right and Glory Lead" and Richard Feltoe's "A Crucible of Fire: The Battle of Lundy's Lane, July 25, 1814.


I used most of the foam from the Queenston Height Project...there was a lot of it, so I used approximately 1/3 of it. I used my standard 6' x 30" tables laid interlocking rubberized floor (the same type used for kid's play room or gym room floors) . This layer make it easy to stick tooth picks through the foam hill section to the table surface.

 Before this part I made copies of the terrain on 8" x 14" paper. I converted all the distances at 15 yards equals 1 inch battle top scale. Normally, I use between 15 and 20 yds = 1 inch depending on the real battlefield size and the limitations of the table size. This scale fits with the rules we use, which is General de Brigade with a growing addendum of war of 1812 unique rule subsets.
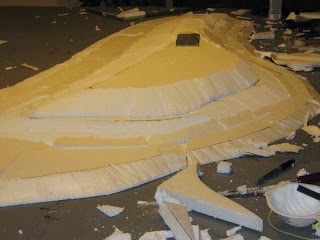
 Needless to say that there was a lot of measuring, cutting, shaping to make the foam fit the topographical map. 
 Placing a flexible road section to verify the space available for Lundy's lane and the plateau area that would be needed to accommodate the meeting house.
 More additions of foam to lessen the steepness on the British slope.
 As with most projects like this, it is very messy. A shop vac is a must.
 A last double check of the maps after a good clean up.
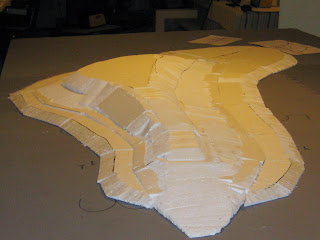
 Surprisingly, the hardest part was creating this long gradual slop to the American entry to the battlefield.
 A side view of the the long slope.
 The opposite end or looking from west to east with the steep (British/Canadian)slope to the left and the long gradual slope to the top right.
I then placed a 8 x 12 ft linen drop sheet over the whole terrain. This evens out the more sharper elements of the foam hill. I then covered the cloth with two 6 x 8 ft terrain cloths. Heavy books were then placed in key points on the terrain mat to mold the terrain cloth to the foam.
I will include the additional terrain features such fences and trees in the next session.