Those Are Regulars!

Those Are Regulars!
Scott Leading the First Brigade

Thursday 19 April 2018

The Battle of Bladensburg -Session One - 17th April, 2018

The battle begins at 1200, so the Americans have a ten minute turn to issue new orders if required. Unfortunately, Secretary Monroe has skillfully (in his mind) ordered the 1st Maryland Regiment to retire 12" and of course they obey. See the American Scenario note to ascertain how this was done. Stansbury is not aware of Monroe's tactical move of his unit as the British start to arrive via the Annapolis road.


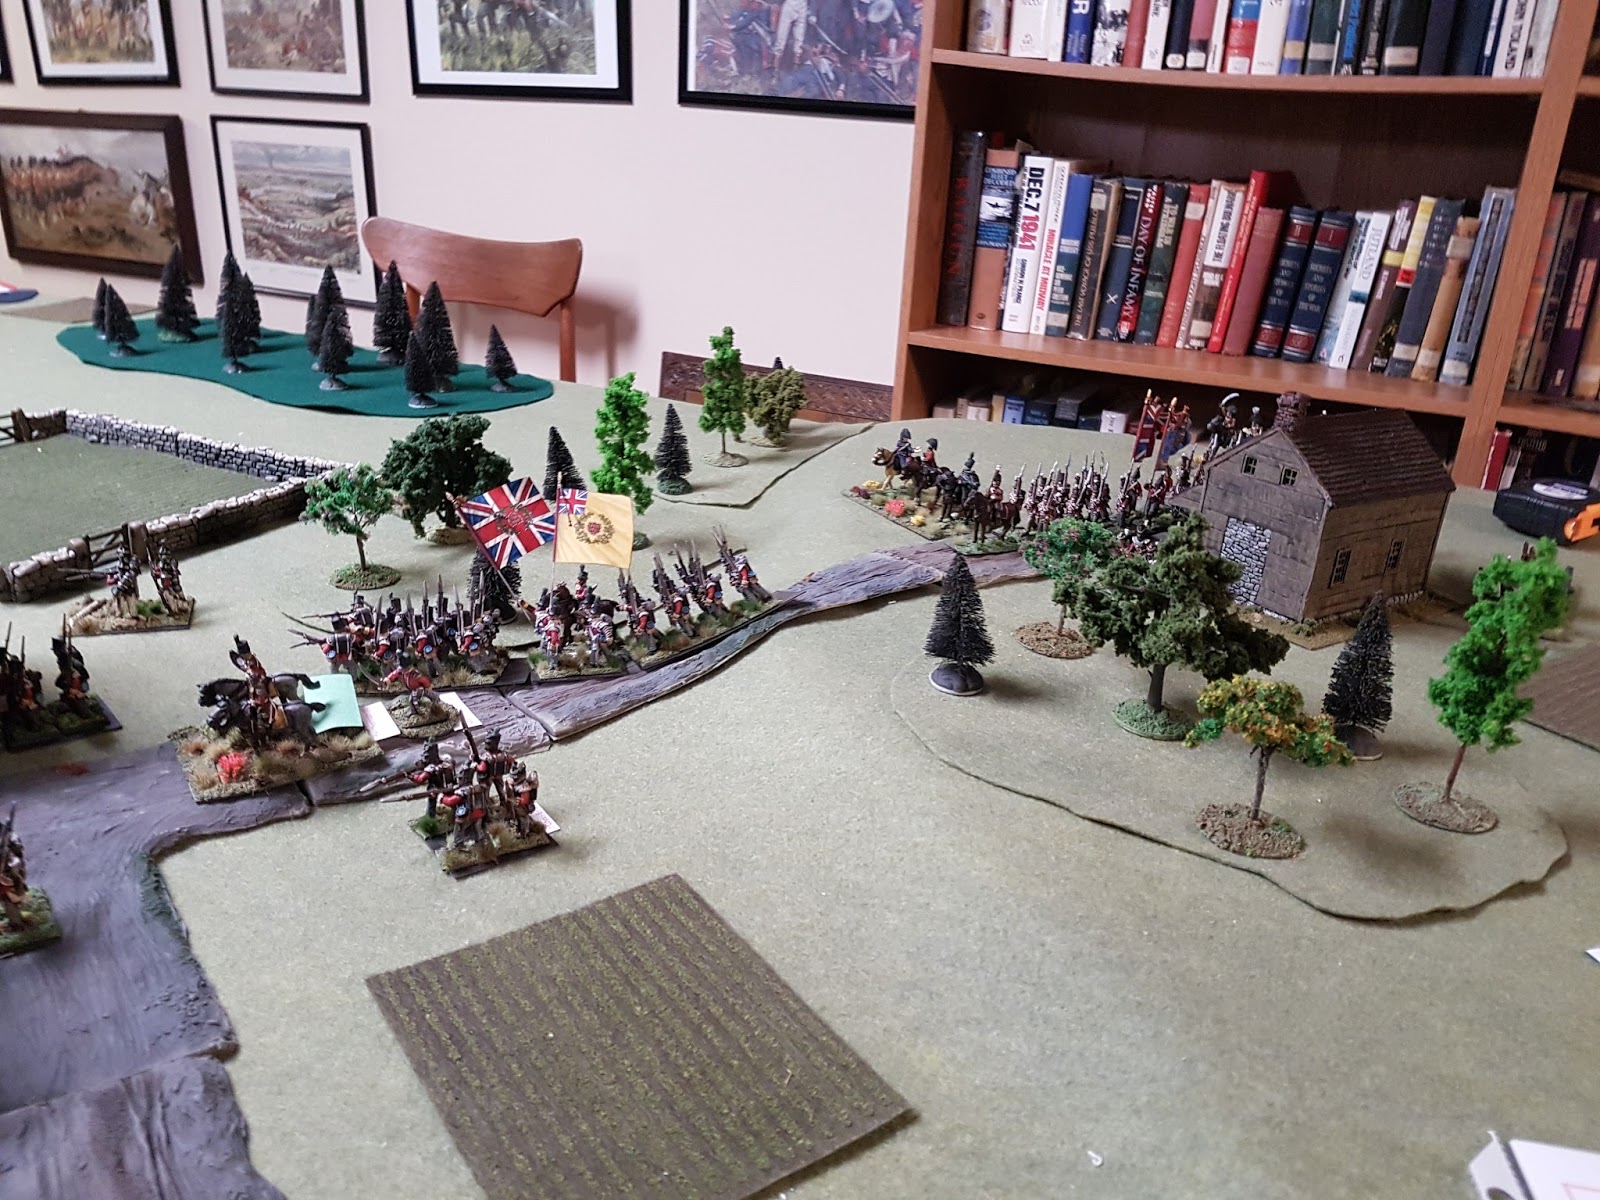
 The combined light companies lead the British First Brigade. Major-Genral Ross observes the American positions. He has just obtained some useful information from an American couple who were eager to exchange this information to preserve their home from looting. Ross now knows that the river is fordable at the Bladensburg mill and above.

This American couple are pleased that the British column is passing by their home.


 The Royal marine rocket battery manages to cause a casualty soon after setting up.

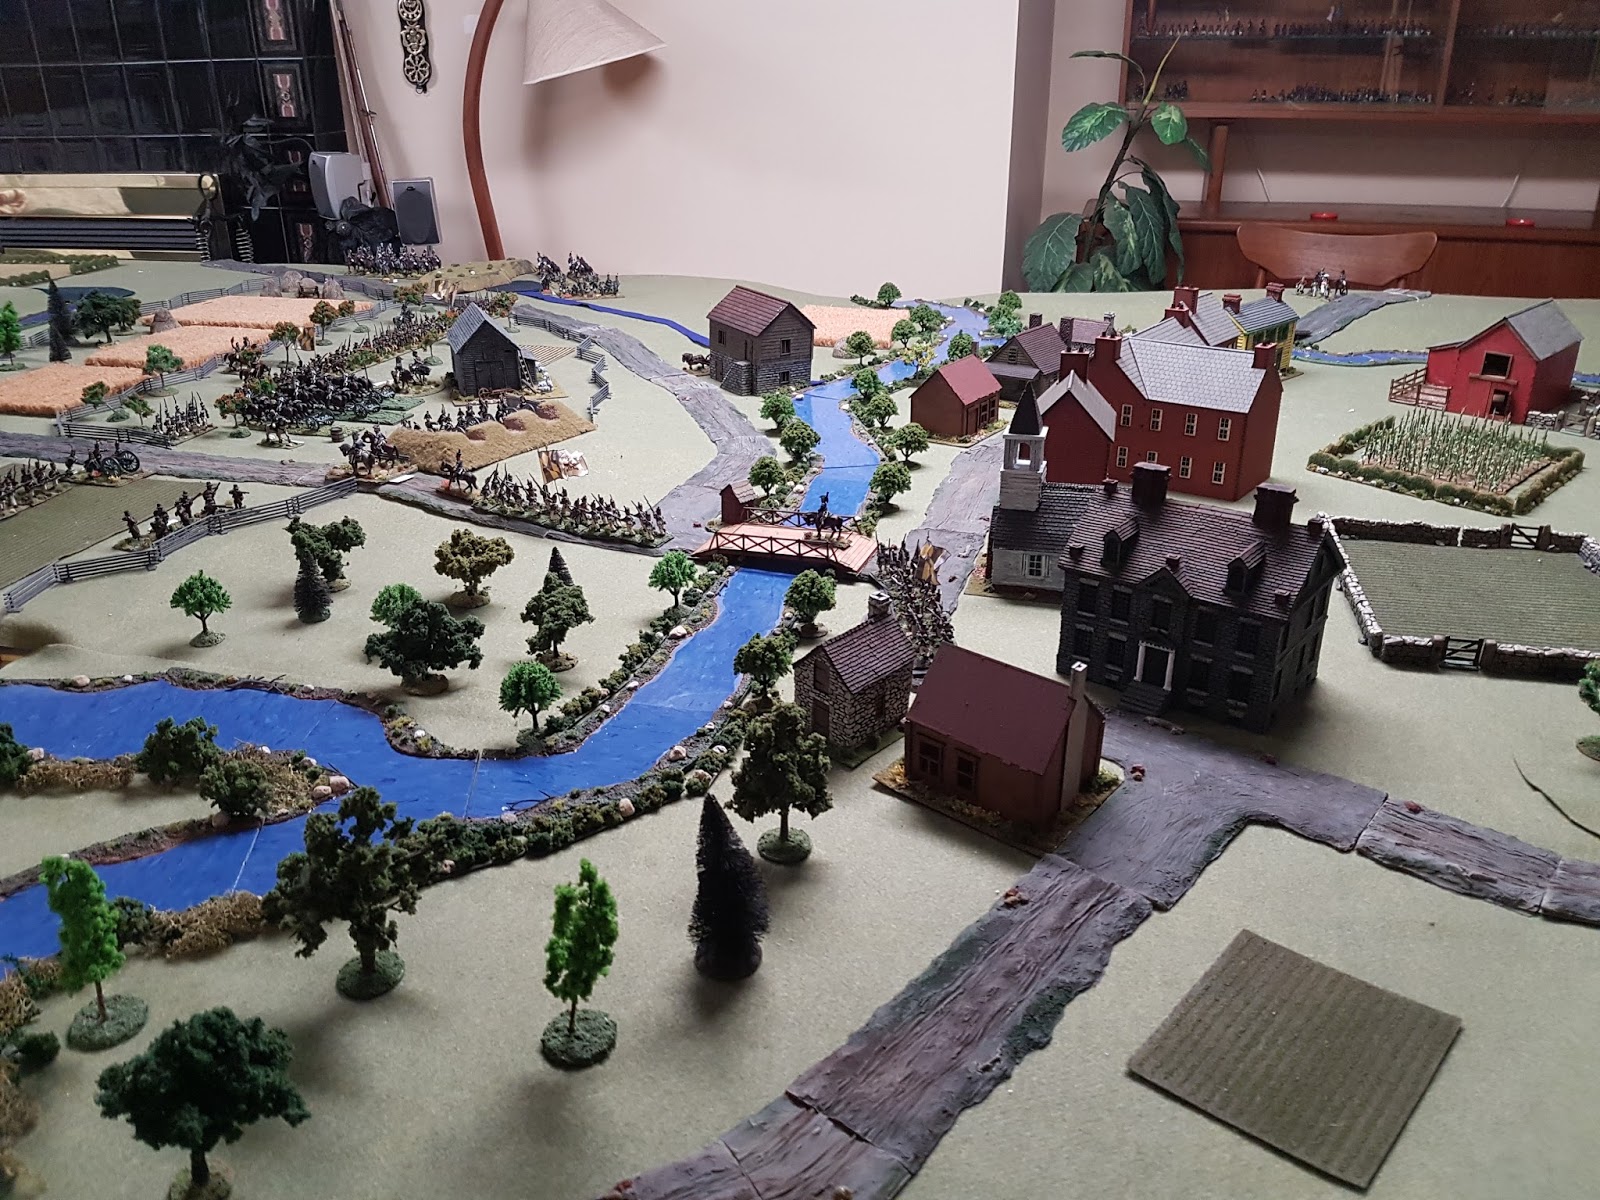
The Following Photos represent the end state at 1340.


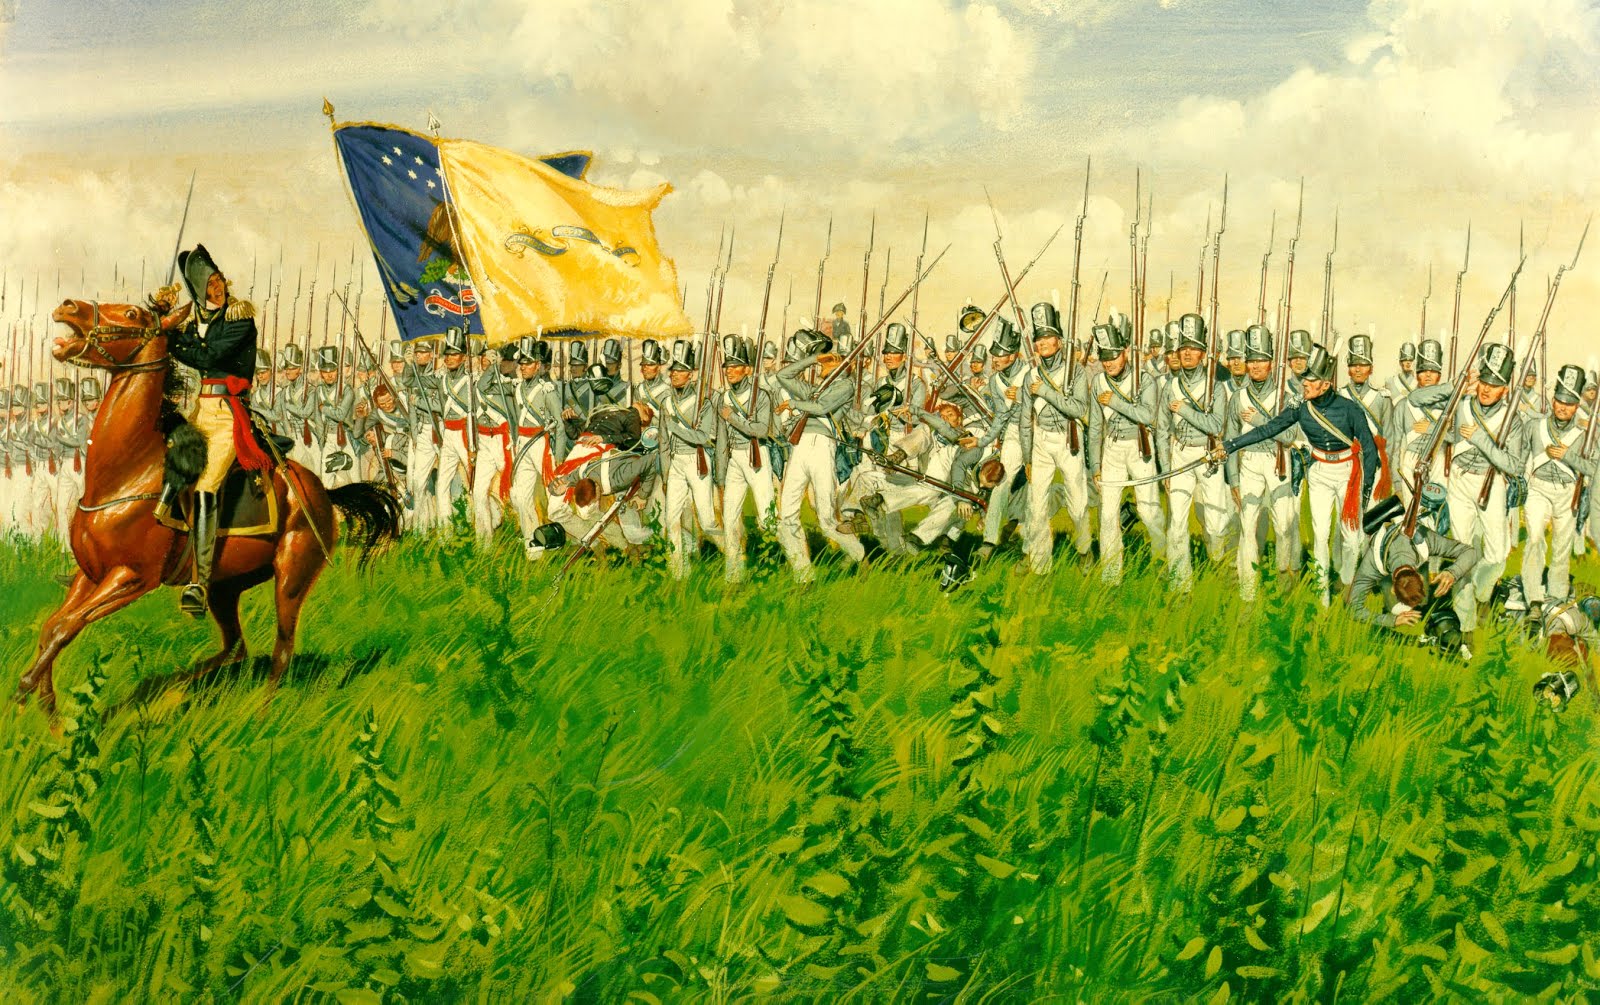
 Commodore Barney's guns arrive via the Washington road. The flotilla-men's field gun is an 18 pdr hauled by civilian contractors. The two 12 pdr field guns are hauled and manned by marines.

I have often wondered if the navy 18 pdr was on a naval truck as per ship mode. But if the following painting is authentic ( I have no reason to doubt the authenticity) then it was definitely a field gun. 

Note the long barrel and the bracket trail of the naval field piece. The model of this gun was purchased from Fife and Drum Figures.

A close up of Barney's 18 pdr. Note the civilian contractors handling the team of horses.


 A bit of an American traffic jam occurs around the Tunnicliff bridge. It seem the First Columbian Brigade has halted while the traffic clears the bridge.

A close up of Monroe and Madison encouraging the troops (center) .


 The regular brigade under LCol William Scott has emerged from the traffic jam in an effort to position itself in the front line.


 Late in the session the redoubt battery finally fires on the approaching British light companies ...who are now in the town... causing a couple of casualties.


 Unlike the actual battle the Maryland volunteer cavalry have received orders and have moved forward to menace a possible British river crossing on the American left flank.


 The Washington Light artillery have limbered up. Where are they going?


 The 85th and two light companies of the advance battalion followed by the Second brigade are moving through the town towards the river. Some of the troops have pilfered some the ripe corn as they march by.


 The Royal Marines enter the battlefield followed closely by the lead company of the Colonial Marines.

The rocket battery is joined by a six and three pounder battery.

A small crowd has gathered on a hill north of Bladensburg to view the coming battle.

Summation

So far the first eleven turns have been a game of tactical maneuver. Still, not unexpected as not all of the British units have entered the battle area. After several more turns of movement, I expect some serious action.  Stay tuned to Session two.


The Battle of Bladensburg - Around 1200 on 24 August 1814


This is the situation around noon on the 24th of August. Brigadier General Winder the commander of 10th Military District--The District of Columbia, has finally arrived (lower right). Major-General Ross' feint towards Old Fields and the Washington bridge has Winder ordering and countermanding his orders to his various senior officers.

Most of the senior American officers including the Secretary of War and the Secretary of State knew that the British must come via Bladensburg if their target was Washington. But not Winder, he thought that they might attack Washington via a southern approach across the very long Eastern Branch Bridge over the Potomoc River. It seems that everyone but Winder understood that this bridge could be easily destroyed, and the river was far too wide and deep for a fording.

 Looking east down the Washington road with Bladensburg in the distance.


 Maryland Regiments of Colonel Beale's Annapolis Brigade wait for orders just above Tunnicliff bridge.


 Units of Brigadier-General Stansbury's brigade stretch out south to north across the Washington road (center foreground) and the Georgetown road in the distance.


 Colonel Wadsworth, the senior American artillery officer took the initiative on the 23rd and built this redoubt, knowing as did many competent officers that the British must come this way ie via Bladensnburg. Unfortunately, the embrasures were constructed for heavy guns so that the six pounder gun barrels were below the level of the gun port. Undaunted the gunners of the First Maryland Artillery Regiment dug out the embrasure with sticks.

 Colonel Beale leads the 17th and 32nd Annapolis regiments across the Bladensburg bridge. He has narrowly avoided being cut off by the advancing British.


 Looking northwards with key Bladnensburg bridge in the center.


 Looking west from behind Bladnesnburg. The bridge is just beyond the church.


 The north end of Bladensburg. It looks like there are some spectators(center right) waiting for the battle to commence.


 A view south to north through Bladensburg.


A view of the left flank of Stanbury's brigade sheltering in the apple orchard.


 Two guns of Captain Burch's Washington Light Artillery were placed (by Monroe) just north of the Georgetown road. Burch can protect Stansbury's left flank from this position. The other gun was ordered to unlimber to the right of the First Maryland Artillery regiment near the Washington road.


 LCol Tilghman and his Maryland cavalry regiments await orders just north of the Georgetown road.


The stage is set and the British will soon arrive. How will they engage American forces? Will the 85th make a historical dash across the Bladensburg bridge but suffer heavy casualties. Or will Ross wait for all of his regiments to catch up before making a general advance?


The Bladensburg Game; OOB, Scenario and Timeline

Background


Vice-Admiral Cochrane's fleet landed the British Army under the command of Major-General Ross at Benedict on the Patuxent River on 19 August 1814. This landing was necessary as larger ships carrying the army could sail no further due to the shallow waters.  Rear-Admiral Cockburn's smaller vessels continued up the Patuxent in search of Commodore Barney's American gunboats. 


For several months Barney's gunboats had been causing havoc against the Royal Navy's raiding forces culminating in the Battle of St Leonard's Creek. In coordination with American regular and militia forces on land, Barney's flotilla broke out the RN's blockade of St Leonard's Creek and sailed up the Patuxent. Barney hoped that the larger British ships would not be able to follow his shallow draft gunboats in the headwaters of the Patuxent River.


Cockburn was determined to destroy Barney's flotilla. While Cockburn chased Barney's gunboats, the British army shadowed the British sailors via a land route that paralleled Cockburn's river route. 

The British Army proceeded from its camp at Nottingham on 21 August to a camp Upper Marlboro on the next day. Meanwhile Cockburn's sailors and marines trapped the American flotilla at Pig's Point. Barney scuttled his fleet of gunboats and proceeded on foot to Washington.

Now that the navy had accomplished its mission, Ross prepared to march his army back to Benedict to reembark with the fleet. However, after much persuasion Rear-Admiral Cockburn convinced  Ross to attack Washington.

Game Orders of Battle.


Scenario, Objectives, Restraints and Options.


Timeline for the Arrival of Reinforcements


Wednesday 18 April 2018

Bladensburg Research

My research into the Battle of Bladensburg is formulated on the structure of the American and British orders of battle. The OOBs are riddled with annotations and footnoted, which provide references on regimental numbers, uniforms, commanders, topography and a myriad of information relevant to simulating the battle. The footnotes will also provide most of the sources used to create the most accurate order of battle possible.

The rules for the War of 1812 games is General de Brigade coupled with an addendum to reflect War of 1812 special circumstances. The figure ratio is 20:1  Please note that on the figure total for each battalion there may be pluses and minuses to avoid odd numbered of figures. These adjustments were tracked to maintain an accurate over all total. 


There were also adjustments in the number of guns as the ratio for GdeB is 2:1, or two real guns equals one table top replica. For example, at Bladensburg the American Marine Artillery had three 12 pdr field guns (1 and 1/2 models). The British only had one six pdr gun. So, the U.S. 12 pdrs were rounded up to four guns (2 gun models) and the British six pounder was rounded up to two (one model gun). The objective was to rationalise the odd number of figures and guns while preserving the overall equality of numbers between the American and British units.


American Order of Battle and Research V2


Page 1


Page 2


Page 3


Page 4


Page 5


Page 6


British Order of Battle and Research V2

Page 1


Page 2


Monday 16 April 2018

The Battle of Bladensburg - Making the Terrain


In late January after nearly finishing the figures for the Battle of Bladensburg...oh sooo many American militia...I finally got around to making the terrain for the Battle of Bladensburg.
After setting up several six foot tables, I covered the tables with (romper room) multi coloured and interlocking foam flooring tiles. This typer of foam allows for the pinning  of various foam terrain items to the tiles. I usually use cocktail sticks to pin items,
The tiles are all numbered and fit together as per the grip pattern shown.


Here are some maps that I used to shape the terrain of the batlefield. On the first map note the outlines of the table. The scale is 1" + 20 yards.


The map below is from the Osprey Chessapeake Campaign book. 


 Above; most of the foam blocks have been pinned. On the right, I used a modified Craney Island (from our last game) to double as Lowndes Hill.


 Adding the JR roads and my home made rivers.


My main reference for topography is a panorama of the battlefiled taken from "In Full Glory Reflected".